How To Edit Photos in Google Photos for Desktop and Mobile
Undoubtedly, Google Photos is one of the best tools to save your photos and manage them. Apart from managing your photos, did you know Google Photos also allows you to make basic edits to your photos? Yes, you don’t need a third-party editor to make small edits like crop, rotate, adjust the light balance, or even add filters.
In this post, I am going to show you how you can use Google Photos photo editor on your desktop and mobile phone.
Edit photos in Google Photos for desktop
Google Photos editor works on your regular photos, collages, and stylized photos. Here’s how to use it:
Open up any photo and click on the “Edit” button at the top-right corner (the equalizer icon).

This will open the photo editor with three sections at the top, including filters, basic adjustment, and crop & rotate section.
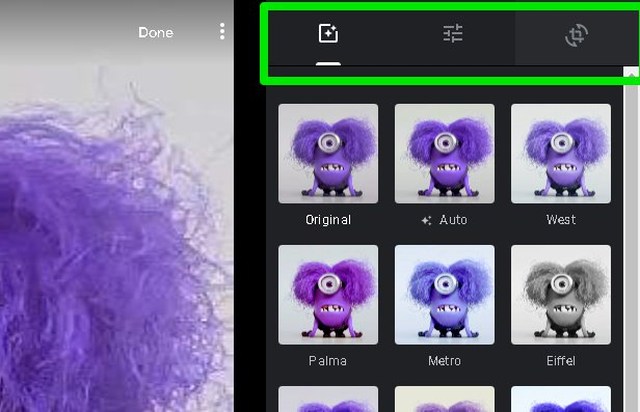
Filters: Google Photos comes with 12 different filters, including Metro, Eiffel, Vogue, West, and more. There is also an “Auto” option that uses Google Photos AI to automatically apply filters and adjust the color balance to make the photo even better. Each filter also has an adjustment bar to adjust the intensity of the filter.

Basic Adjustments: Here you can adjust the color, light, and color pop. There is a downward arrow next to the “Light” and “Color” options that opens up further options to adjust. Some of the options include shadows, contrast, highlights, vignettes, saturation, warmth, and more.

Crop & Rotate: This section allows you to crop and rotate the photo manually or at a predefined value. You can click and hold on the corner of the photo to adjust the crop section and use the ruler on the right side to adjust the rotation. There are two buttons at the top-right corner that will let you fully rotate a photo or crop it by a fixed scale.

When you have made the required edits, click on the “Done” button at the top-right corner of the photo and your changes will be saved.

Edit Photos in Google Photos mobile app
The same photo editing options are available on the Google Photos Android and iOS apps. Although the features may work a little differently, but all the editing options of the desktop version are available on the mobile apps. Here’s how to edit photos on Google Photos mobile app.
Open up the photo that you want to edit and tap on the “Edit” button at the bottom-left corner.
This will open a similar photo editor with sections to apply filters, adjust color & light, and crop & rotate photos. You can interact with the options the same way as the desktop, but some functions do work a little differently. For example, you’ll have to double-tap on a filter to open the adjustment slider.
Once you are done making the changes, you can tap on the “Save” button at the top to save the changes.

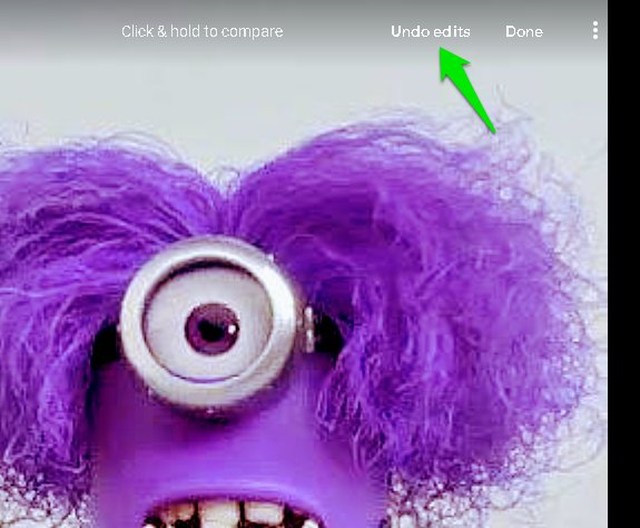
You can easily undo edits made to your photos, even the ones that have been saved. All you need to do is open up the photo in Google Photos photo editor and click on the “Undo edits” button at the top.
Ending words
The Google Photos photo editor offers almost all the basic photo editing options that you need for daily photo editing. It should be able to give some final touches to your photos to make them look better, such as adding natural filters and adjusting light and color. There are many choices of apps that have photo editing tools such as filters, brightness, vignette, and cropping, but it can be a challenge to decide which ones are the best.
Do let us know in the comments if you find the Google Photos photo editor useful.